Deactivation (Restoring Authentication Information) of VOCALOID Products
Deactivation (Restoring Authentication Information)
Before uninstalling VOCALOID products including Voice Banks, for example to transfer them to a new computer, their activation status should be cleared from the authentication server by performing deactivation (returning the activation key from your computer to the server).
VOCALOID products can be uninstalled from [Programs and Features] on your computer without being deactivated, but if you do so you may be unable to perform activation when installing the products on a different computer. Since authentication information is not restored when uninstalling before deactivating, whenever possible, it is recommended to deactivate VOCALOID products before they are uninstalled.
Special Notes for Deactivation
To perform deactivation, the product’s authentication information must be registered on the computer you are using. Before initializing your hard disk for OS reinstallation, etc., be sure to perform deactivation.
A computer that can connect to the Internet is required to perform deactivation.
If the computer where the VOCALOID product was installed is not connected to the Internet:
Use a separate computer that can connect to the Internet to perform deactivation. See the Offline Deactivation Steps webpage for details.
Deactivation Steps
Product Category
| Product | OS | |
|---|---|---|
| VOCALOID4 Editor | Windows | |
| VOCALOID4 Library | Windows | Mac OSX |
| VOCALOID4 Job Plugin VocaListener | Windows | |
| VOCALOID4 Editor for Cubase | Windows | Mac OSX |
| VOCALOID™3 Editor (SE) | Windows | |
| VOCALOID™3 Library | Windows | Mac OSX |
| VOCALOID™3 Job Plugin VocaListener | Windows | |
| VOCALOID Editor for Cubase(NEO) | Windows | Mac OSX |
Deactivation of VOCALOID4 Editor, Voice Banks and VocaListener (Windows)
1. Select [Start] > [Apps] > [VOCALOID Deactivation Tool] on your computer, then click [VOCALOID Deactivation Tool]

2. The message [Do you want to allow the following program to make changes to this computer?] will be displayed on the [User Account Control] screen.
If you want to allow this, click [Yes] to continue.
If you do not want to allow this, click [No] to exit the deactivation tool.
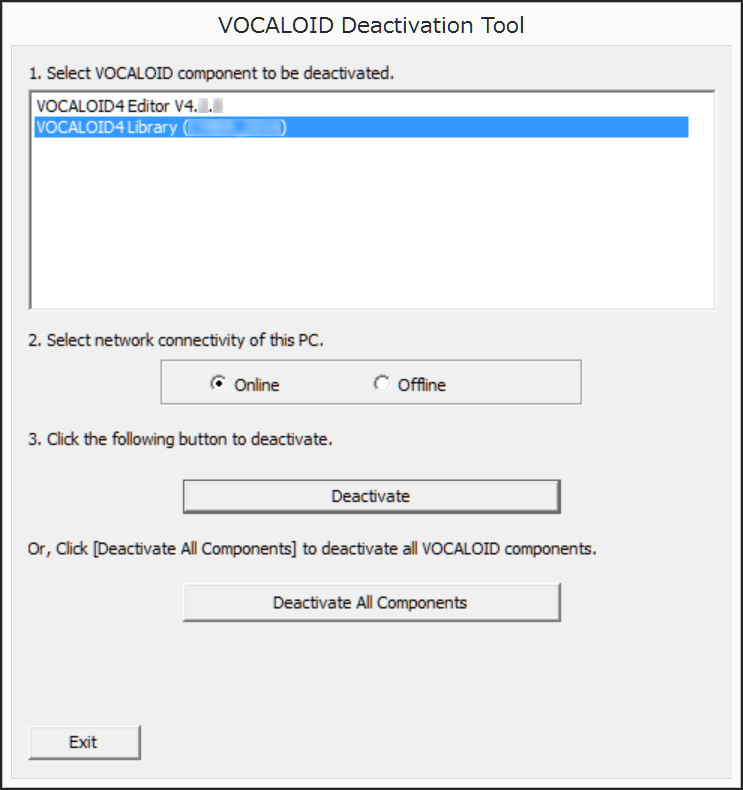
3. The “Deactivation” screen will be displayed. Select the components to be deactivated.

4. Select [Online] and click [Deactivate].
To deactivate all products, click [Deactivate All Components].
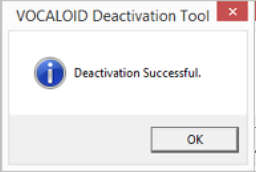
5. The deactivation will be performed, and the [Success] screen will be displayed upon completion. Click [OK] to exit.

Deactivation of VOCALOID4 Editor for Cubase (Windows)
1. Select [Start] > [Apps] > [VOCALOID4 Editor for Cubase 64bit] on your computer, then click [License Manager].
(If you have installed VOCALOID4 Editor for Cubase 32bit in a 32bit environment, select [VOCALOID4 Editor for Cubase 32bit] instead)

2. The message [Do you want to allow the following program to make changes to this computer?] will be displayed on the [User Account Control] screen.
If you want to allow this, click "Yes" to continue.
If you do not want to allow this, click "No" to exit the installer.
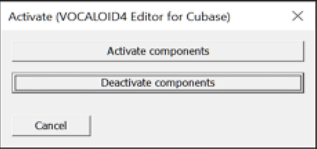
3. The [Activate (VOCALOID4 Editor for Cubase)] screen will be displayed. Click [Deactivate components].

4. The [Deactivation] screen will be displayed.
![The [Deactivation] screen](http://rsc-net.vocaloid.com/assets/image_files/14c6e74465e219abefde899f3133aa49/online_deact_img_06_en.png)
5. Select [Online] and click [Deactivate].
6. The deactivation will be performed, and the [Deactivation Successful] screen will be displayed upon completion. Click [OK] to exit.
![The [Deactivation Successful] screen](http://rsc-net.vocaloid.com/assets/image_files/bb660417ba848b18e66f78412266902b/online_deact_img_07_en.png)
Deactivation of VOCALOID4 Editor for Cubase and Voice Banks (Mac OSX)
1. Select [Macintosh HD], [Applications], and [VOCALOID] on your computer, and then double-click [VOCALOID License Manager].
2. [VOCALOID License Manager wants to make changes. Type your password to allow this.] is displayed.
To allow this, type your password and then click [OK].
To not allow this, click [Cancel] to exit [VOCALOID License Manager].
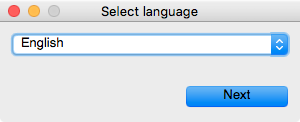
3. The "Select language" screen will be displayed. Select "English" and click "Next"

4. The [VOCALOID License Manager] screen will be displayed. Select [Deactivate product]. and click [Next].
![The [VOCALOID License Manager] screen](http://rsc-net.vocaloid.com/assets/image_files/edd83aa53a7f4cdfdca85e4b06d3dfef/online_deact_img_08_en.png)
5. The [Deactivation] screen will be displayed.
![The [Deactivation] screen will be displayed.](//rsc-net.vocaloid.com/assets/image_files/e022ee6603876aaa04cb1116b94f0254/online_deact_img_10_en.png)
6. Select [Online] and click [Deactivate].
If you want to remove the license, click "Yes" to continue.
If you do not want to remove the license, click "No" to return deactivation screen.
7. [This action will deactivate the selected component, and then remove the license information from this computer. Are you sure?] will be displayed.
If you want to remove the license, click "Yes" to continue.
If you do not want to remove the license, click "No" to return deactivation screen.
![[This action will deactivate the selected component, and then remove the license information from this computer. Are you sure?] will be displayed.](http://rsc-net.vocaloid.com/assets/image_files/26d043911fd13eb0c879687c112ea35d/online_deact_img_10_en.png)
8. The deactivation will be performed, and the [Deactivation Success] screen will be displayed upon completion. Click [OK] to exit.
![[Deactivation Success]](http://rsc-net.vocaloid.com/assets/image_files/002127fec75e4fd8127174fede5118bd/online_deact_img_11_en.png)
![The [Deactivation] screen will be displayed.](http://rsc-net.vocaloid.com/assets/image_files/e022ee6603876aaa04cb1116b94f0254/online_deact_img_10_en.png)